Getting started
When building your Workflow, you can configure your document fields to be filled with either dynamic or static values. Dynamic values can either be drawn from Webform fields, JavaScript expressions, or signer information. Literal values are constant and will be filled across all your submissions.
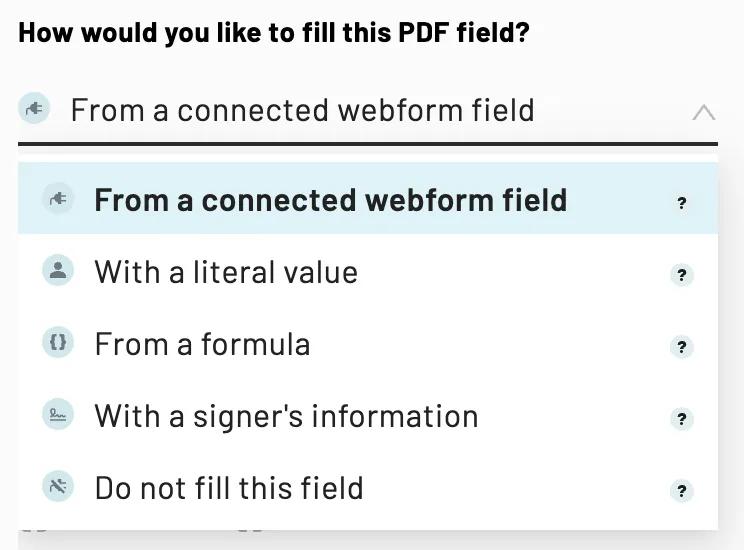
 Anvil Workflows support several PDF fill options.
- From a connected Webform field: Fill PDF fields with information that has been entered into a Webform field.
- With a literal value: Fill a field with a static string. We recommend this option if a field will always be filled with the same information.
- From a formula:* Unlock more granularity by choosing to fill a PDF field with a formula or JavaScript expression. This option is commonly used to execute calculations with information entered in Webform fields.
- With a signer’s information: Automatically fill Name and Email type fields with a signer’s information.
- Do not fill this field: If you want to reset a fields' fill settings, selecting this option allows you to easily disconnect your PDF field. It preserves the PDF field, allowing you to reconnect it at any time.
* Please note that formulas and expressions are a custom plan feature.
Fill PDF fields with Webform fields
You can fill your documents with information collected through your Webforms by mapping your Webform fields to your PDF fields. A single Webform field can be mapped across multiple PDF fields, so you only need to collect any given piece of information from your users once.
You can either map existing Webform fields to your PDF fields though the PDF editor or create a new Webform field from an existing PDF field.
To connect existing Webform and PDF fields:
- Navigate to your Workflow editor
- Click on the PDF tab in the top nav bar
- Locate and select the relevant PDF field
- Under the How would you like to fill this PDF field?, select
From a connected webform field - Click Choose a webform field to connect
- Search for and select the relevant Webform field
Note: Some field types like Name and Radio Group will include additional output optional values.
To connect existing PDF fields to new Webform fields:
- Navigate to your Workflow editor
- Click on the PDF tab in the top nav bar
- Locate and select the relevant PDF field
- Under the How would you like to fill this PDF field?, select
From a connected webform field - Click Choose a webform field to connect
- Select add a new connected Webform field
- Configure the field’s settings
- Add field
Notes:
- Newly added fields will have the same field name and type as the corresponding PDF field.
- Fields will automatically be added to the bottom of your specified Webform page. Read this article to learn how to reorder Webform fields.
- See this article to connect a PDF field to a new Webform field from the Webform editor instead.
Fill PDF fields with literal values
If the information that goes in a PDF field will be the same for each submission, you don't need to collect that information via the Webform. Instead, you can fill that PDF field with a literal value.
To fill a PDF field with literal values
- Navigate to your Workflow editor
- Click on the PDF tab in the top nav bar
- Locate and select the relevant PDF field
- Under the How would you like to fill this PDF field?, select
With a literal value - Enter desired Value
